
How to Install a FERRO Thermostatic Valve with an Immersion Tube? A Practical Step-by-Step Guide
The FERRO thermostatic valve with an immersion tube is a practical solution for use in decorative and bathroom radiators, especially where simultaneous use of an electric heater is planned. Its greatest advantage is the ability to supply and return the heating medium through a single connection. However, for the valve to operate correctly and reliably, it must be installed properly. Below are step-by-step instructions.
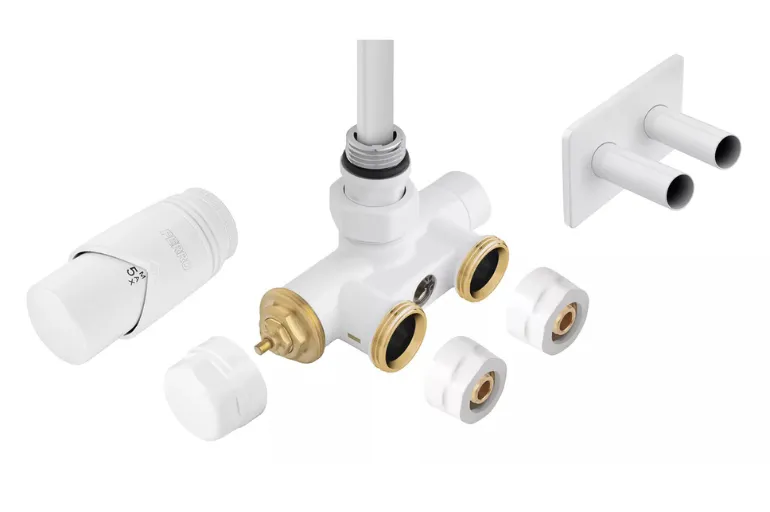
Preparing the System
Before you begin installation:
- thoroughly flush the system and—if possible—install filters to protect the system from contaminants,
- protect the thread onto which the thermostatic head will be mounted with a protective cap.
Valve Installation
- Install the valve so that the axis of the thermostatic head is horizontal. This is important for its proper operation.
Installing the immersion tube
- Unscrew the fitting from the valve body.
- Insert the tube into the radiator connection so that its end protrudes a few millimeters below the fitting.
- Insert the tube into the distribution sleeve inside the valve.
- Pay special attention to the end of the tube—it is asymmetrical and must be properly aligned. Hot water should flow in from the bottom, through the interior of the tube, and the return flow should exit through a special opening in the sleeve ring.
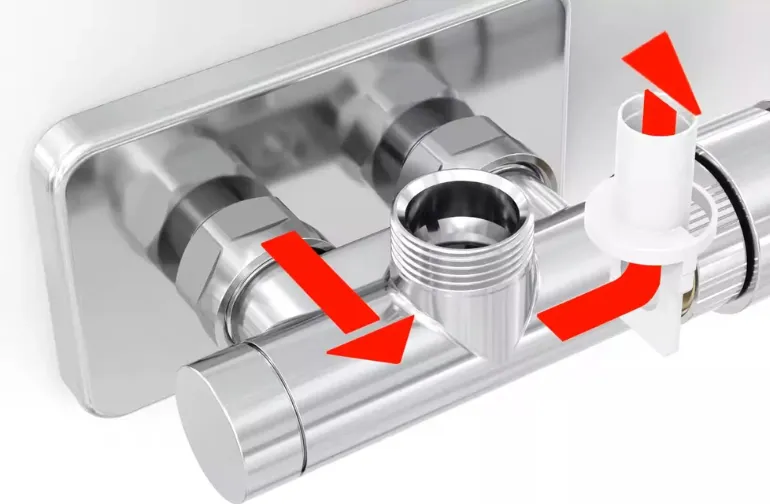
- For radiators with a short manifold, the tube must be cut to the appropriate length beforehand.
Installation and Sealing
- Screw the threaded fitting with a gasket into the radiator connection and tighten it with a SW20 flat-head wrench.
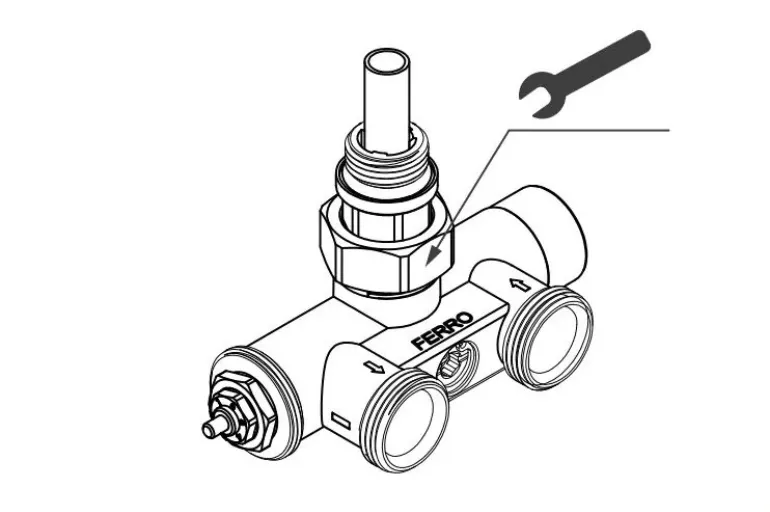
- Make sure the entire assembly is installed at a right angle to the connections.
Checking the Flow Direction
- Make sure that the solid part of the dividing sleeve (S) is on the supply side.
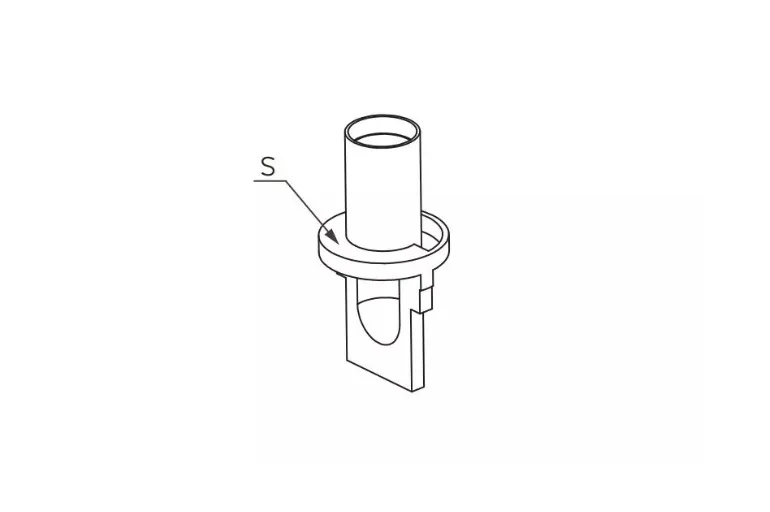
This is crucial—only then will the flow be properly distributed: water will enter through the tube at the top of the radiator and return through the space around it.
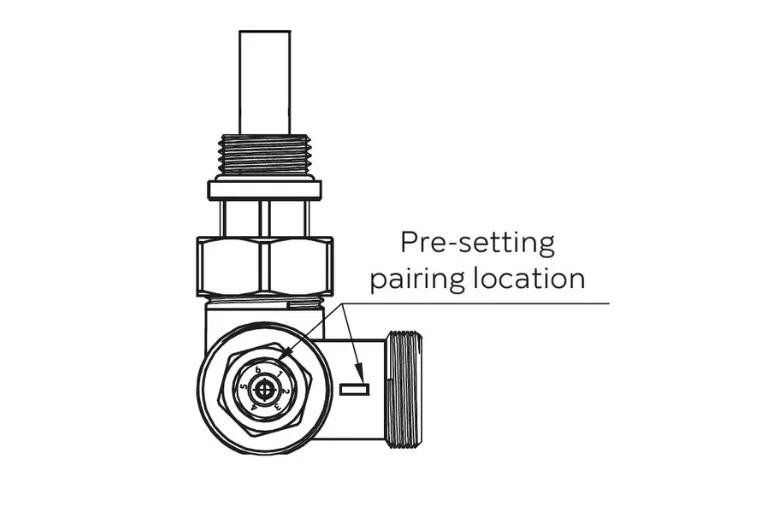
Adjusting the preset value
- Use a 13 mm wrench to set the flow rate by turning the valve insert head.
- The factory setting is position 6, but depending on your needs, you can adjust it within the range of 1 to 6. For example: position 3 corresponds to a flow rate of 0.074 m³/h. You can read more about the preset here.
Installing the valve requires precision, especially when positioning the tube inside the sleeve, but thanks to the well-thought-out design of the entire kit, it is not difficult and does not require specialized tools. A properly installed FERRO thermostatic valve with an immersion tube will ensure efficient radiator operation, convenient temperature control, and an aesthetically pleasing installation—especially if the radiator is to be supplemented with an electric heating element.
You can find more expert advice on the FERRO PRO YouTube channel.