
How to Install a FERRO Electric Heating Element in a Bathroom Radiator – A Practical Step-by-Step Guide
Installing an electric heating element in a radiator is a simple way to keep your bathroom warm regardless of the heating season. Learn how to install it according to the manufacturer’s instructions—safely and neatly. Read this practical guide.
During transitional seasons—spring and fall—when mornings and evenings can be chilly, it’s nice to warm up the bathroom, even if not the entire house. In such situations, an electric heater comes in handy, allowing you to use your bathroom heater independently of the central heating system.
FERRO Electric Heater—What’s Included in the Kit?
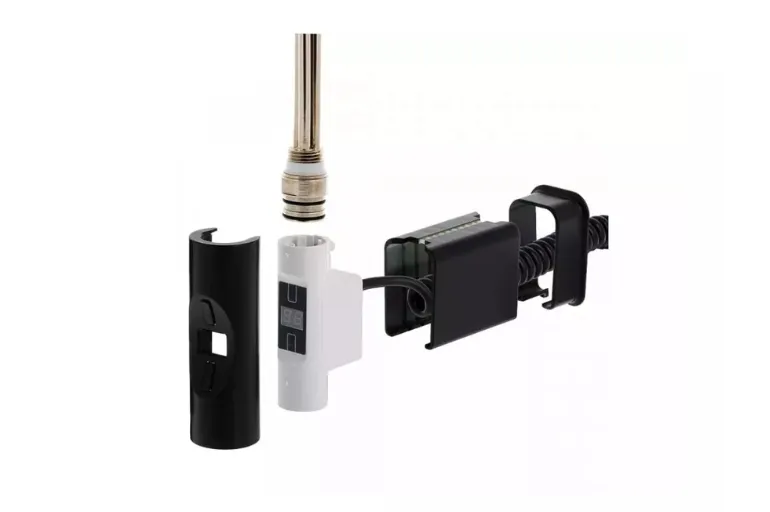
Before you begin installation, check that the kit is complete. It should include:
- a heating element with a mounting thread,
- a controller with a power cord,
- cover plates in two shapes (round and square),
- a wall plate for adjusting the cover’s length,
- an Allen wrench for securing the controller.
Installing the FERRO heating element in a bathroom radiator—step by step
1. Selecting and preparing the installation location
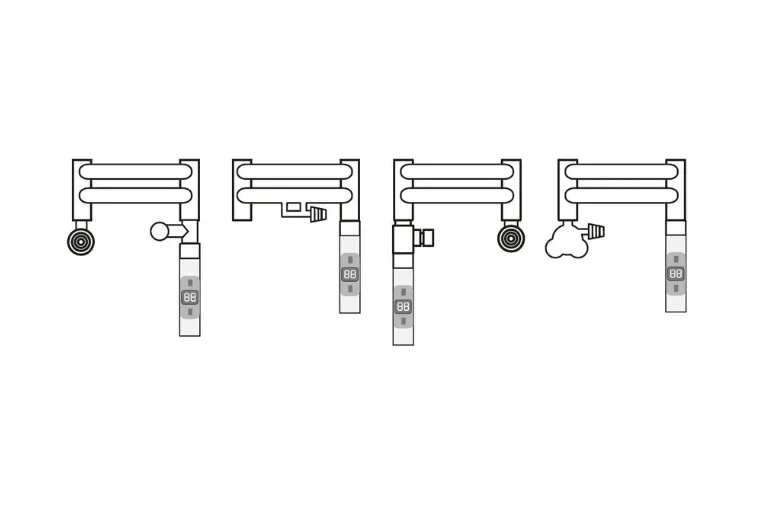
Always install the heater in the lower outlet of the radiator. Choose the one that is free—on the opposite side from the thermostatic valve.
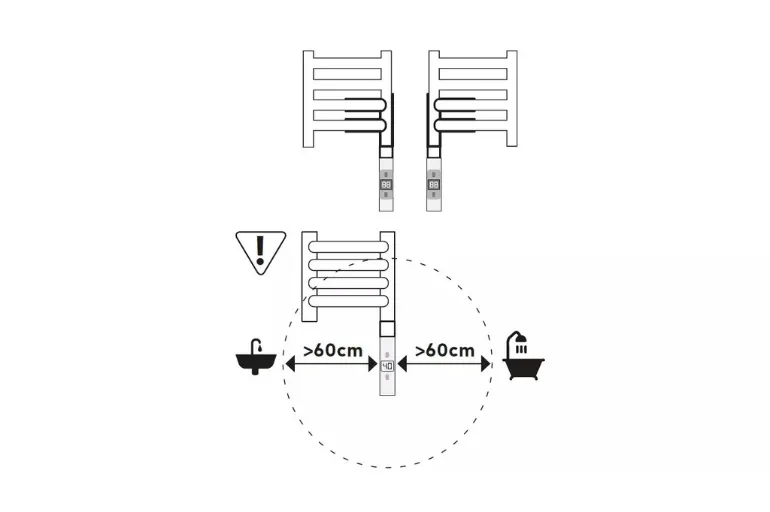
CAUTION! For safety reasons (risk of electric shock), the electric heater must be installed at least 60 cm from the edge of the bathtub or shower!
Ensure access to an electrical outlet with a grounding prong.
Once you’ve determined the installation location, close the valves and drain the water from the radiator—preferably through the lower air vent or drain valve. Then unscrew the cap from the lower connection.
2. Installing the heating element
- Insert the heating element into the selected radiator port and screw it in by hand, then tighten it with a 24 mm wrench .
- Be careful not to use too much force—the O-ring provides the seal.
- Position the heating element so that the red dot on its housing faces forward—this is important for the subsequent installation of the controller.
3. Installing the Cable Cover
The cover neatly conceals the controller cable. You’ll need to trim it to size:
- Trim both halves of the cover to a length equal to the distance between the radiator and the wall—you can use a serrated knife.
- Make sure the halves are mirror images of each other—only then will they fit together correctly.
- After cutting, assemble the halves—the clips should click into place.
4. Installing the cover and rosette
- Slide the assembled cover onto the controller cable.
- From the wall side, slide on the wall-mounted rosette —this component allows for additional length adjustment of the entire cover.
5. Connecting the controller to the heating element
- Slide the controller onto the pin protruding from the heating element.
- Make sure the unit slides in smoothly and is securely seated.
- Tighten the screw on the back of the controller using the included Allen wrench —this ensures a secure connection.
- Caution! Do not connect the device to the power supply yet.
6. Installing the exterior cover
- Choose a decorative cover that matches the style of the heater (round or square).
- Place it over the controller—the latches should click into place, holding the cover securely in position.
7. Preparing the heater for operation
- Before turning on the heater:
- Fill the system with water ,
- Thoroughly bleed the system —air in the system can damage the heating element,
Be careful not to close both the supply and return valves at the same time—due to the thermal expansion of water, this can cause pressure to build up in the radiator.
8. Connecting the heater to the power supply
Once everything is assembled:
- plug the cord into an outlet with a grounding pin.
The heater is ready to go—you can set the temperature and enjoy the warmth whenever you need it.
Done! Quick and safe installation
You can install the FERRO heater yourself in just a few minutes. It’s a simple solution that will ensure a comfortable temperature in your bathroom all year round, regardless of whether your central heating system is running.
See also:
Heat on Demand—FERRO Bathroom Radiator Heater
FERRO Thermostatic Valve with Immersion Tube—Functionality and Aesthetics in One
How to Install a FERRO Thermostatic Valve with a Immersion Tube? A Practical Step-by-Step Guide
Want to buy a heater? Check out these store locations
Want to know more? Contact us
Find more expert advice on the FERRO PRO YouTube channel.